Part 2: Creating Your First 2D Scene in Godot 4

Welcome back! In Part 1, we set up our workshop and opened the Godot editor. Now, it’s time to lay the first brick of our game.
Reserved for AdSense Revenue
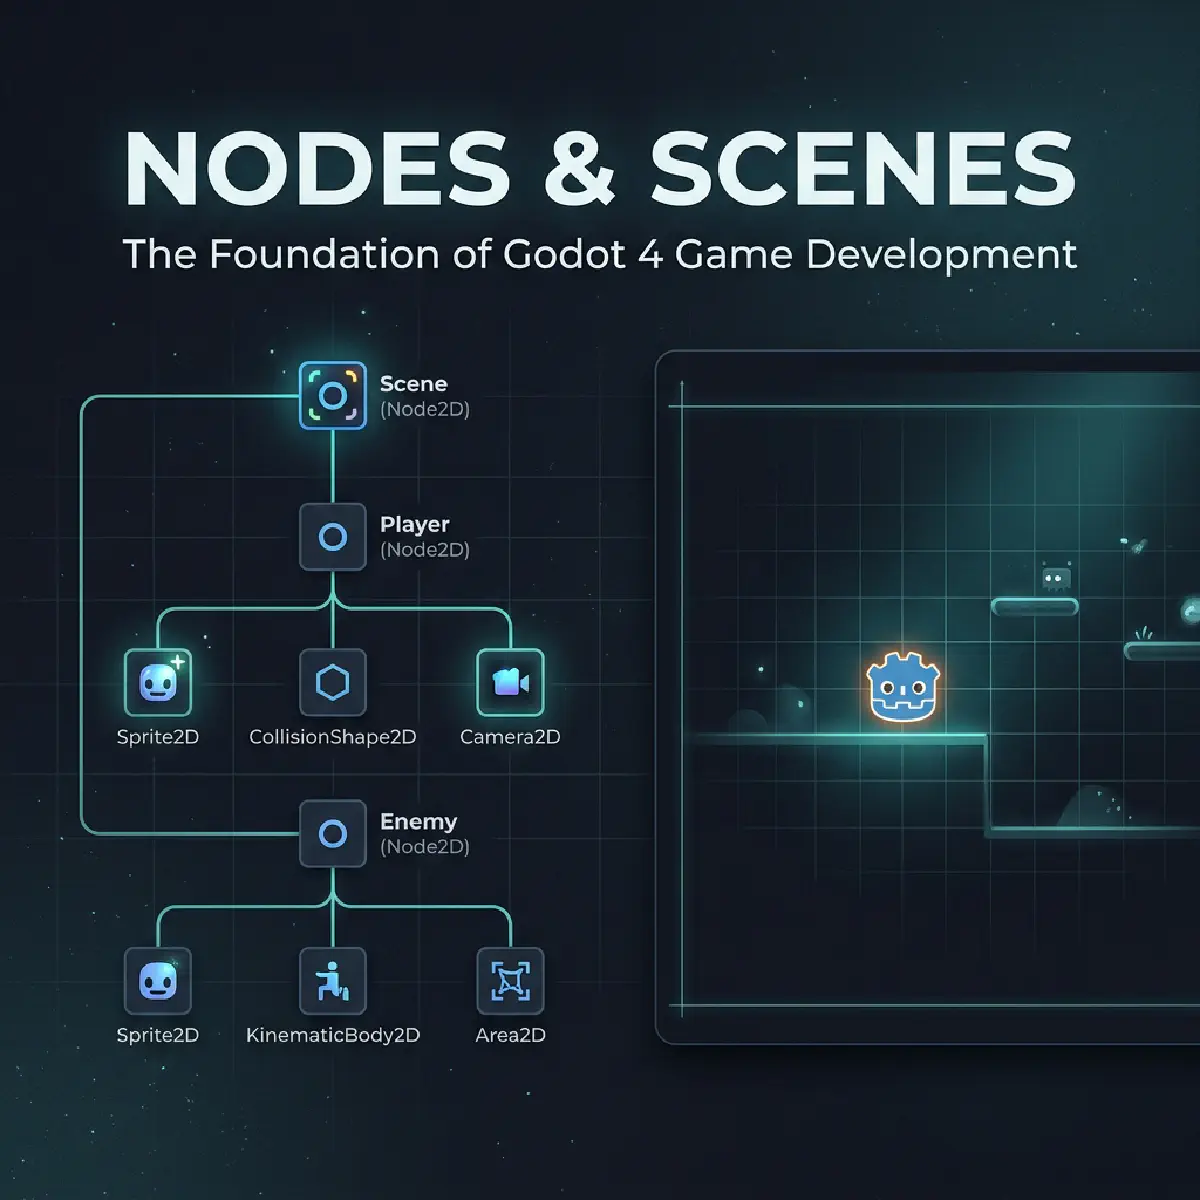
Nodes: The Legos of Game Development
In some engines, objects are complicated, monolithic entities. In Godot, everything is a Node.
Think of Nodes like Lego bricks. One brick might just be a flat plate (a 2D Node), another might be a wheel (a Physics Node), and another might be a tiny plastic light (a Light Node). You snap them together to build something bigger, like a car or a castle.
When you group these bricks together and save them, Godot calls that a Scene.
Creating the Main Scene
Let’s build our first “container” for the game world.
- In the top-left Scene dock, click 2D Scene. This creates a generic
Node2D. - Naming is important: Double-click that node and rename it to
World. - Save early, save often: Press
Ctrl + Sand save it asworld.tscn.
Note: In Godot,
.tscnstands for “Text Scene.” It’s just a simple text file that tells Godot where all your “Lego bricks” are placed.
Adding a Visual: The Sprite
A game without visuals is just a spreadsheet. Let’s add something to look at.
- Right-click your
Worldnode and select Add Child Node. - Search for
Sprite2D. - Look at the FileSystem dock (bottom-left). See that
icon.svg? That’s the Godot mascot, “Godot” (or “Robbie”). - Drag
icon.svginto the Texture slot in the Inspector (the right-hand panel).
Boom! You have a visual character in your world.
Our First Script: Making it Move
Now, let’s give our sprite some “brains.” Click the tiny scroll icon with a plus sign at the top of the Scene dock to attach a script to your Sprite2D.
Here is the code to make our character rotate and move. We’ll break down the magic below.
| |
What is _process and delta?
This is where the real game development happens.
_process(delta): This function runs every single frame. If your game is running at 60 frames per second, Godot calls this function 60 times every second.delta: This is a tiny number representing how much time passed since the last frame.
Why use Delta? Computers aren’t perfect. Sometimes one frame takes slightly longer to render than the next. If we didn’t use
delta, your character would move faster on a powerful PC and slower on an old laptop.deltamakes sure the movement is frame-rate independent.
Key Takeaways
- Nodes are the building blocks; Scenes are the collections.
- Sprites are the simplest way to get an image on screen.
- Scripts are attached to nodes to give them logic.
- Delta is your best friend for smooth, consistent movement.
In the next part, we’ll dive into Scripting Fundamentals to understand exactly how that code works!
Reserved for AdSense Revenue
Join the Veigatec Dev Loop
Get the latest Godot, Flutter, and Web Development engineering insights delivered straight to your inbox. No fluff, just code.
We respect your privacy. Unsubscribe at any time.